本教程将向您展示如何使用 Spring Boot 和 Kotlin 构建一个简单的聊天应用程序。您将从语法的角度了解使用 Kotlin 进行服务器端开发的好处。
我们将从应用程序的最小实现开始,并逐步完善它。起初,应用程序将生成并显示虚假消息,并使用传统的阻塞请求-响应模型将数据传递到 UI。通过本教程,我们将通过添加持久化和扩展功能,并迁移到非阻塞的流式风格来逐步完善应用程序,从而实现从后端到 UI 的数据传输。
本教程由 5 部分组成:
-
第一部分:初始设置与项目介绍
-
第二部分:添加持久化与集成测试
-
第三部分:实现扩展功能
-
第四部分:使用 Kotlin Coroutines 重构为 Spring WebFlux
-
第五部分:使用 RSocket 进行流式处理
本教程面向已经接触过 Spring MVC / WebFlux 的 Java 开发人员,旨在展示如何在 Spring 中使用 Kotlin。
第一部分:初始设置与项目介绍
要开始学习本教程,我们需要一个最新版本的 IntelliJ IDEA——2018.1 之后的任何版本。您可以在此处下载最新的免费社区版本 here。
本项目基于 Spring Boot 2.4.0,它需要 Kotlin 1.4.10。请确保已安装 Kotlin 插件的 1.4+ 版本。要更新 Kotlin 插件,请使用 Tools | Kotlin | Configure Kotlin Plugin Updates。
下载项目
从 IntelliJ IDEA 克隆仓库,选择 文件 | 新建 | 从版本控制项目。

指定项目路径:https://github.com/kotlin-hands-on/kotlin-spring-chat。

克隆项目后,IntelliJ IDEA 会自动导入并打开它。或者,您也可以通过命令行克隆项目:
$ git clone https://github.com/kotlin-hands-on/kotlin-spring-chat
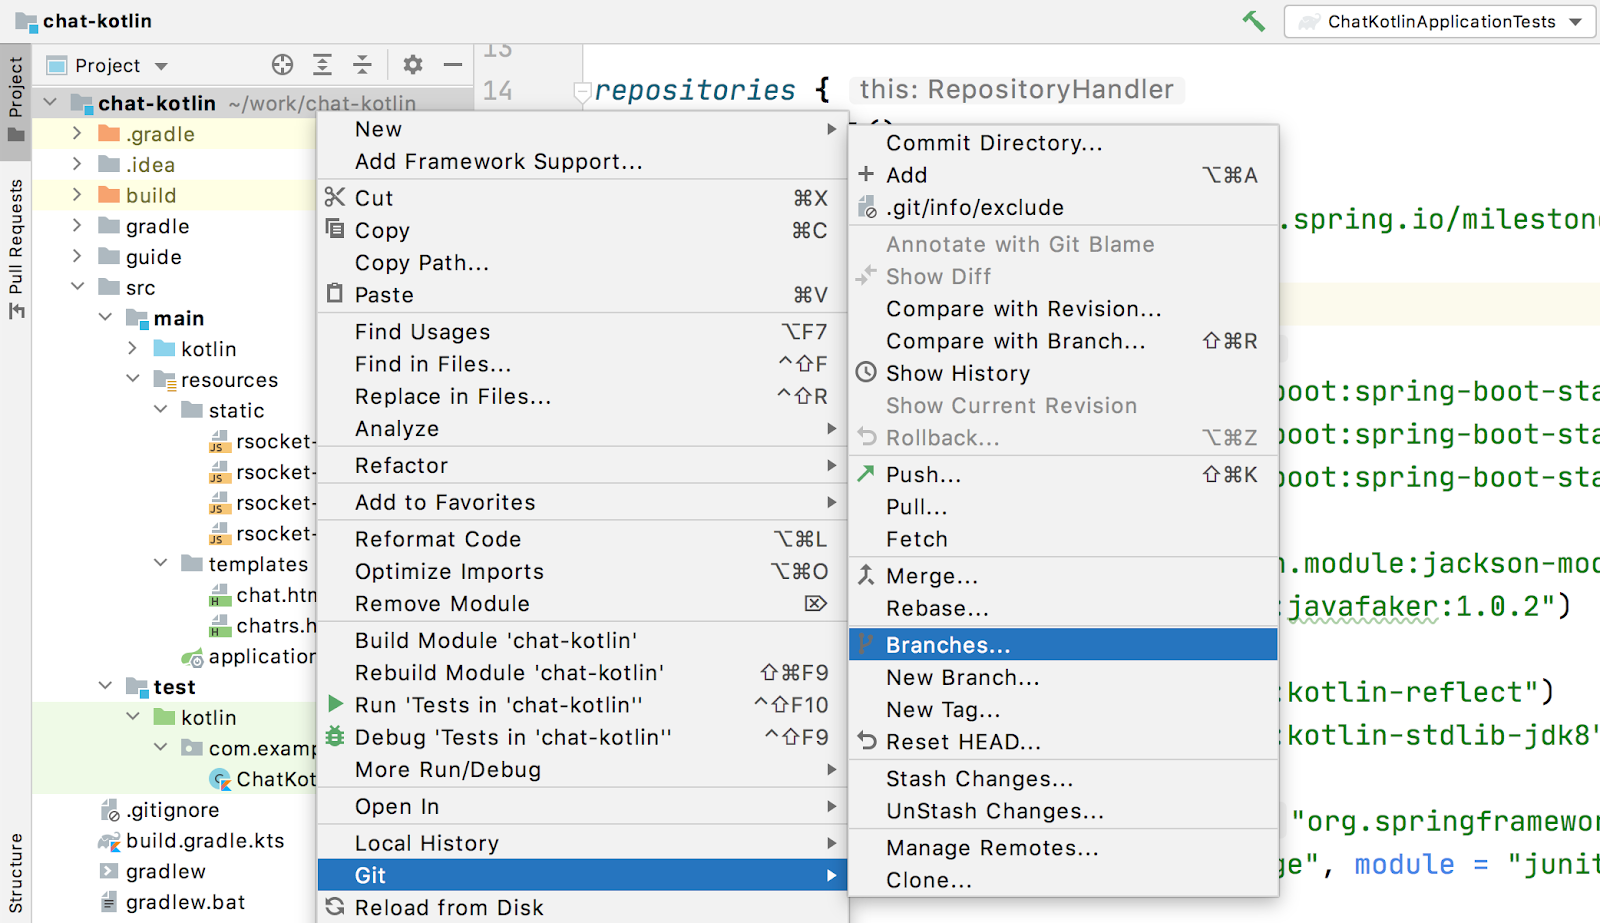
解决方案分支
请注意,该项目包含了教程每个部分的解决方案分支。您可以通过调用“Branches”操作在 IDE 中浏览所有分支:
或者,您也可以使用命令行:
git branch -a
在 IntelliJ IDEA 中,您可以使用 Compare with branch 命令将您的解决方案与提供的解决方案进行比较。
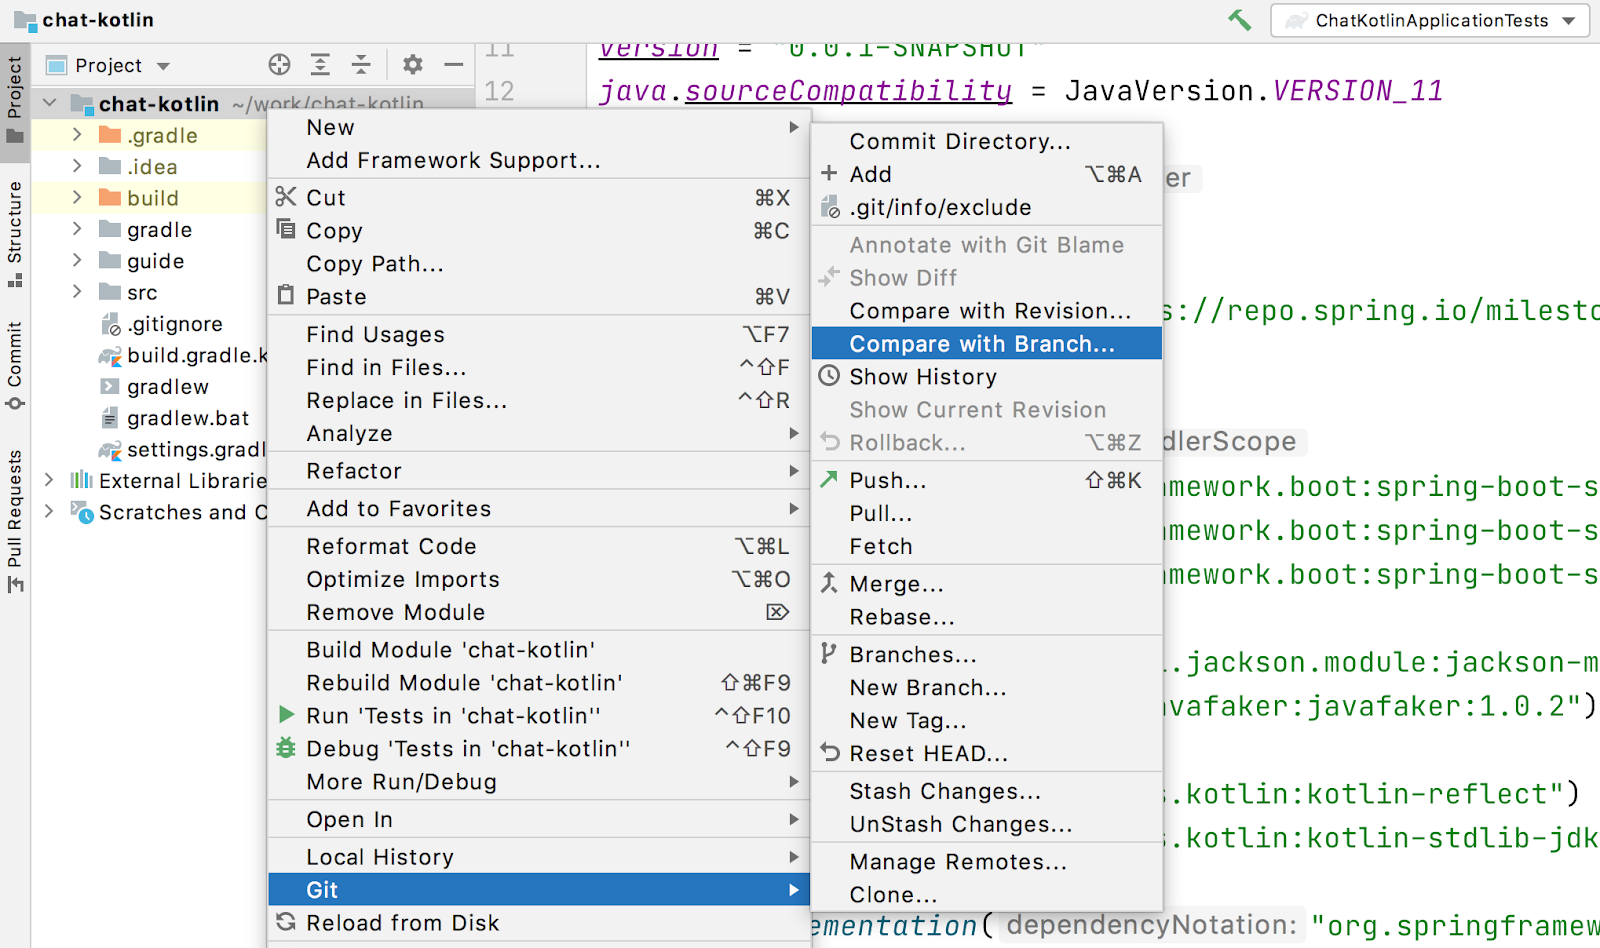
例如,以下是 initial 分支和 part-2 分支之间的差异列表:
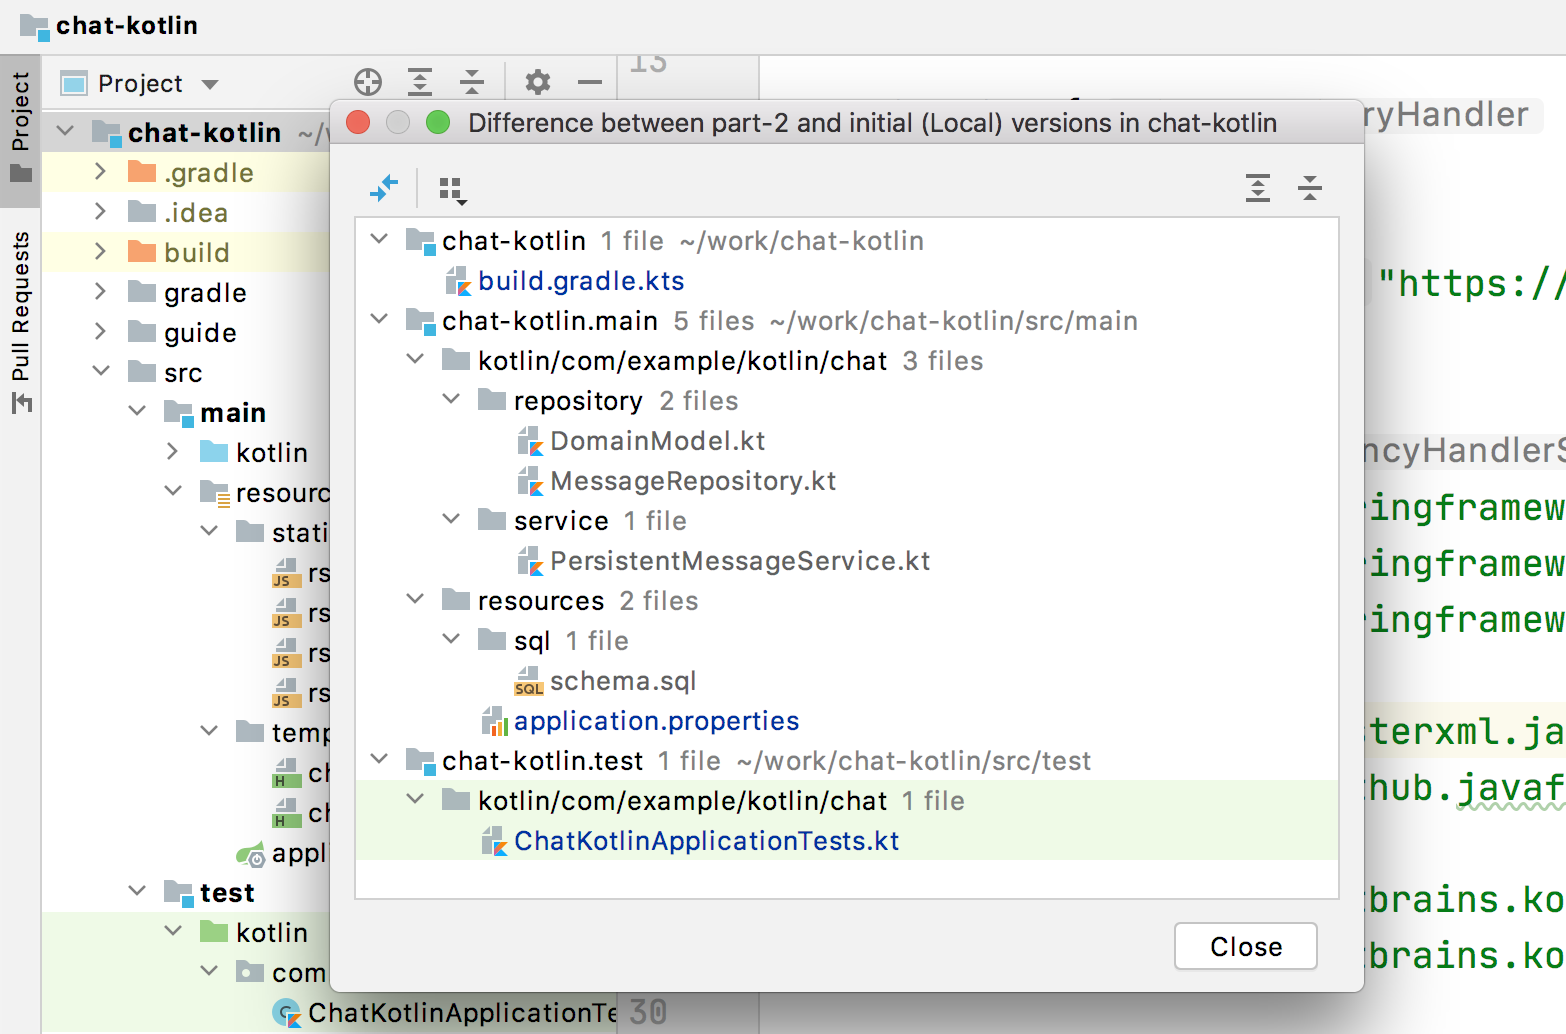
通过点击单个文件,您可以在行级别查看更改。

如果在教程的任何阶段遇到困难,这应该能帮助到您。
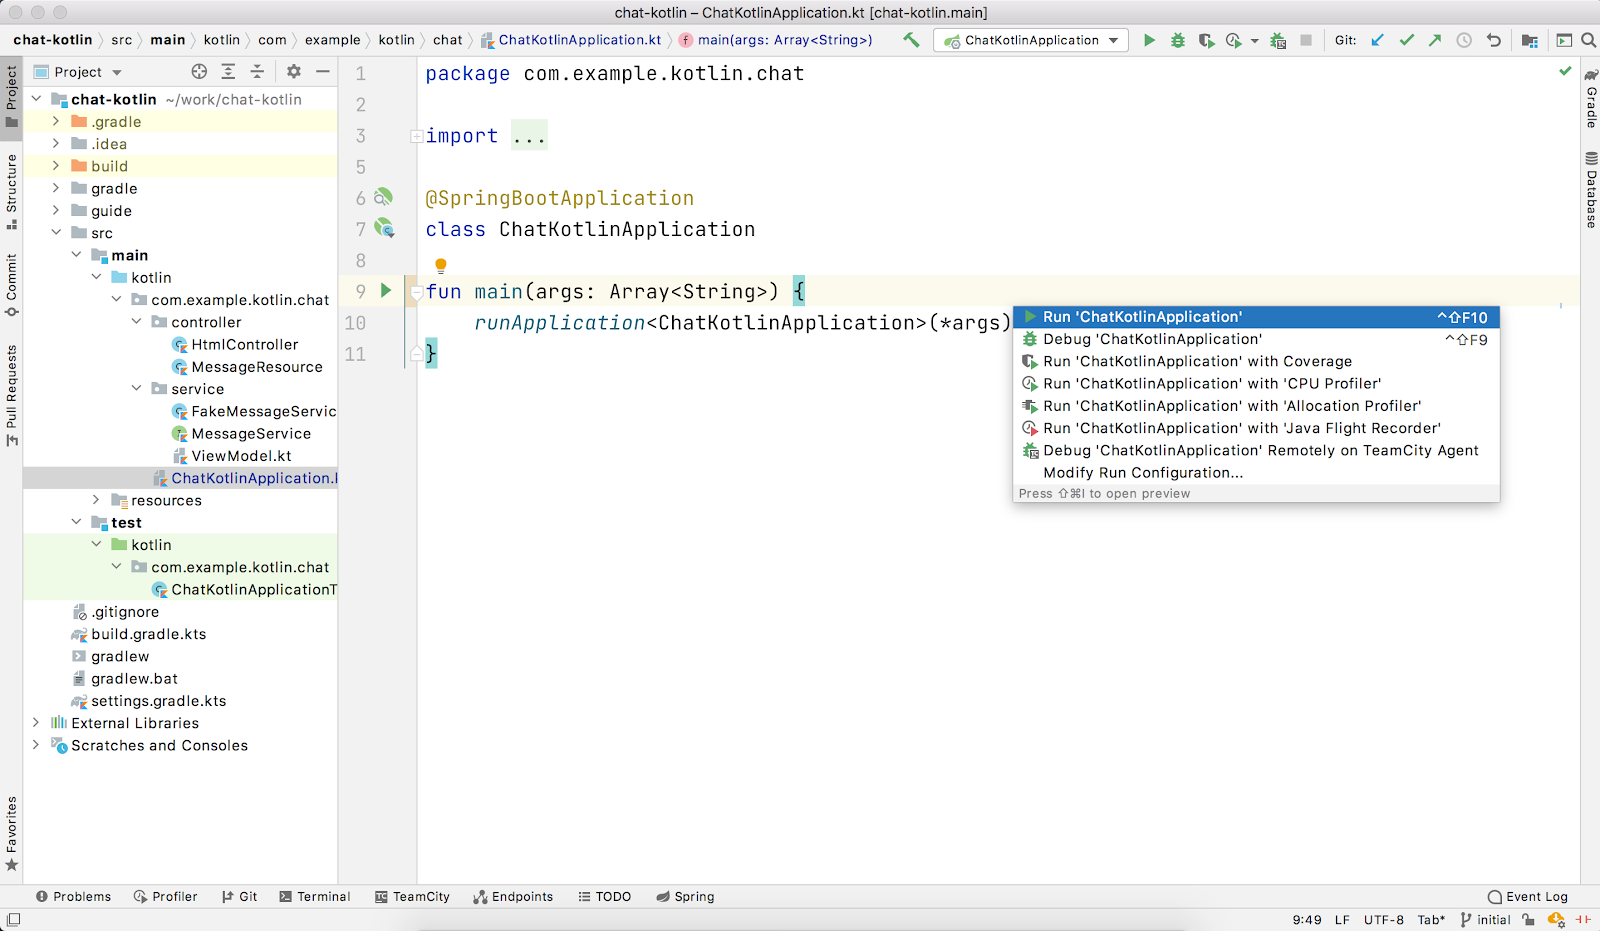
启动应用程序
应用程序的 main 方法位于 ChatKotlinApplication.kt 文件中。只需点击 main 方法旁边的 gutter 图标,或者按下 Alt+Enter 快捷键,即可在 IntelliJ IDEA 中调用启动菜单:
或者,您也可以在终端中运行 ./gradlew bootRun 命令。
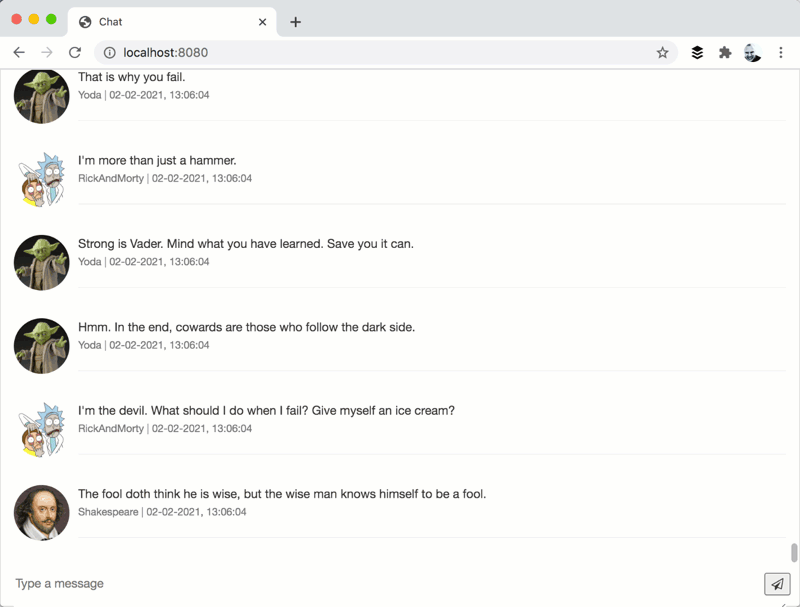
当应用程序启动后,请打开以下 URL:http://localhost:8080。您将看到一个包含一系列消息的聊天页面。
在接下来的步骤中,我们将演示如何将应用程序与真实数据库集成,以存储消息。
项目概览
让我们来看一下应用程序的总体概述。在本教程中,我们将构建一个具有以下架构的简单聊天应用程序:

我们的应用程序是一个典型的三层 Web 应用。面向客户端的层由 HtmlController 和 MessagesResource 类实现。应用程序通过 Thymeleaf 模板引擎进行服务器端渲染,并由 HtmlController 提供服务。消息数据 API 由 MessagesResource 提供,它连接到服务层。
服务层由 MessagesService 表示,它有两种不同的实现:
-
FakeMessageService– 第一个实现,用于生成随机消息 -
PersistentMessageService– 第二个实现,用于与真实数据存储交互。我们将在本教程的第二部分添加此实现。
PersistentMessageService 连接到数据库以存储消息。我们将使用 H2 数据库,并通过 Spring Data Repository API 访问它。
在您下载项目源码并在 IDE 中打开后,您将看到以下结构,其中包括上述提到的类。

在 main/kotlin 文件夹下,有属于应用程序的包和类。在该文件夹中,我们将添加更多类,并对现有代码进行修改,以逐步完善应用程序。
在 main/resources 文件夹中,您将找到各种静态资源和配置文件。
test/kotlin 文件夹包含测试代码。我们将根据主应用程序的更改,相应地修改测试源码。
应用程序的入口点是 ChatKotlinApplication.kt 文件。这是 main 方法所在的位置。
HtmlController
HtmlController 是一个带有 @Controller 注解的端点,它将暴露一个使用 Thymeleaf 模板引擎 生成的 HTML 页面。
import com.example.kotlin.chat.service.MessageService
import com.example.kotlin.chat.service.MessageVM
import org.springframework.stereotype.Controller
import org.springframework.ui.Model
import org.springframework.ui.set
import org.springframework.web.bind.annotation.GetMapping

@Controller
class HtmlController(val messageService: MessageService) {
   @GetMapping("/")
   fun index(model: Model): String {
       val messages = messageService.latest()

       model["messages"] = messages
       model["lastMessageId"] = messages.lastOrNull()?.id ?: ""
       return "chat"
   }
}
💡在 Kotlin 中,您可以立即注意到的一个特性是类型推断。这意味着代码中的某些类型信息可以被省略,由编译器来推断。
在我们上面的示例中,编译器通过查看 messageService.latest() 函数的返回类型,知道 messages 变量的类型是 List<MessageVM>。
💡Spring Web 用户可能会注意到,在这个示例中,Model 被用作 Map,尽管它并没有扩展这个 API。这通过另一个 Kotlin 扩展成为可能,该扩展为 set 运算符提供了重载。更多信息,请参阅运算符重载文档。
💡空安全是该语言最重要的特性之一。在上面的示例中,您可以看到这一特性的应用:messages.lastOrNull()?.id ?: ""。首先,?. 是安全调用运算符,它检查 lastOrNull() 的结果是否为 null,然后获取 id。如果表达式的结果为 null,则我们使用 Elvis 运算符来提供一个默认值,在我们的示例中是一个空字符串("")。
MessageResource
我们需要一个API端点来处理轮询请求。该功能由MessageResource类实现,该类以JSON格式公开最新消息。
如果指定了lastMessageId查询参数,端点将返回特定消息ID之后的最新消息,否则返回所有可用的消息。
@RestController
@RequestMapping("/api/v1/messages")
class MessageResource(val messageService: MessageService) {

   @GetMapping
   fun latest(@RequestParam(value = "lastMessageId", defaultValue = "") lastMessageId: String): ResponseEntity<List<MessageVM>> {
       val messages = if (lastMessageId.isNotEmpty()) {
           messageService.after(lastMessageId)
       } else {
           messageService.latest()
       }

       return if (messages.isEmpty()) {
           with(ResponseEntity.noContent()) {
               header("lastMessageId", lastMessageId)
               build<List<MessageVM>>()
           }
       } else {
           with(ResponseEntity.ok()) {
               header("lastMessageId", messages.last().id)
               body(messages)
           }
       }
   }

   @PostMapping
   fun post(@RequestBody message: MessageVM) {
       messageService.post(message)
   }
}
💡在 Kotlin 中,if 是一个表达式,它会返回一个值。这就是为什么我们可以将 if 表达式的结果赋值给一个变量:val messages = if (lastMessageId.isNotEmpty()) { … }\ 💡 Kotlin 标准库包含了一些 作用域函数,它们的唯一目的是在对象的上下文中执行代码块。在上面的示例中,我们使用 with() 函数来构建一个响应对象。
FakeMessageService
FakeMessageService 是 MessageService 接口的初始实现。它为我们的聊天提供虚假数据。我们使用 Java Faker 库来生成这些虚假数据。该服务使用莎士比亚、尤达和《瑞克和莫蒂》中的名言生成随机消息:
@Service
class FakeMessageService : MessageService {

    val users: Map<String, UserVM> = mapOf(
        "Shakespeare" to UserVM("Shakespeare", URL("https://blog.12min.com/wp-content/uploads/2018/05/27d-William-Shakespeare.jpg")),
        "RickAndMorty" to UserVM("RickAndMorty", URL("http://thecircular.org/wp-content/uploads/2015/04/rick-and-morty-fb-pic1.jpg")),
        "Yoda" to UserVM("Yoda", URL("https://news.toyark.com/wp-content/uploads/sites/4/2019/03/SH-Figuarts-Yoda-001.jpg"))
    )

    val usersQuotes: Map<String, () -> String> = mapOf(
       "Shakespeare" to { Faker.instance().shakespeare().asYouLikeItQuote() },
       "RickAndMorty" to { Faker.instance().rickAndMorty().quote() },
       "Yoda" to { Faker.instance().yoda().quote() }
    )

    override fun latest(): List<MessageVM> {
        val count = Random.nextInt(1, 15)
        return (0..count).map {
            val user = users.values.random()
            val userQuote = usersQuotes.getValue(user.name).invoke()

            MessageVM(userQuote, user, Instant.now(),
                      Random.nextBytes(10).toString())
        }.toList()
    }

    override fun after(lastMessageId: String): List<MessageVM> {
        return latest()
    }

    override fun post(message: MessageVM) {
        TODO("Not yet implemented")
    }
}
💡 Kotlin 提供了函数类型,我们通常以lambda 表达式的形式使用它们。在上面的示例中,userQuotes 是一个映射对象,其中键是字符串,值是 lambda 表达式。类型签名 () → String 表示该 lambda 表达式不接受任何参数,并返回 String 类型的结果。因此,userQuotes 的类型被指定为 Map<String, () → String>。
💡 mapOf 函数允许您创建由 Pair 组成的映射,其中 Pair 的定义是通过一个扩展方法 <A, B> A.to(that: B): Pair<A, B> 提供的。
💡 TODO() 函数有两个作用:提醒作用和占位作用,因为它总是抛出 NotImplementedError 异常。
FakeMessageService 类的主要任务是生成随机数量的假消息并发送到聊天界面。latest() 方法就是实现这一逻辑的地方。
val count = Random.nextInt(1, 15)
return (0..count).map {
    val user = users.values.random()
    val userQuote = usersQuotes.getValue(user.name).invoke()

    MessageVM(userQuote, user, Instant.now(), Random.nextBytes(10).toString())
  }.toList()
在 Kotlin 中,要生成一个整数范围,我们只需要写出 (0..count)。然后我们应用 map() 函数将每个数字转换为一条消息。
值得注意的是,从任何集合中随机选择一个元素也非常简单。Kotlin 为集合提供了一个扩展方法,称为 random()。我们使用这个扩展方法从列表中选取并返回一个用户:users.values.random()
一旦用户被选中,我们需要从 userQuotes 映射中获取该用户的引述。从 userQuotes 中选择的值实际上是一个 lambda 表达式,我们必须调用它才能获取真正的引述:userQuotes.getValue(user.name).invoke()
接下来,我们创建 MessageVM 类的一个实例。这是一个用于将数据传递给客户端的视图模型:
data class MessageVM(val content: String, val user: UserVM, val sent: Instant, val id: String? = null)
💡对于数据类,编译器会自动生成 toString、equals 和 hashCode 函数,从而减少您需要编写的工具代码量。
第二部分:添加持久化和集成测试
在这一部分,我们将使用 Spring Data JDBC 和 H2 作为数据库,实现一个持久化版本的 MessageService 接口。我们将引入以下类:
-
PersistentMessageService–MessageService接口的一个实现,它将通过 Spring Data Repository API 与实际的数据存储进行交互。 -
MessageRepository– 由MessageService使用的仓库实现。
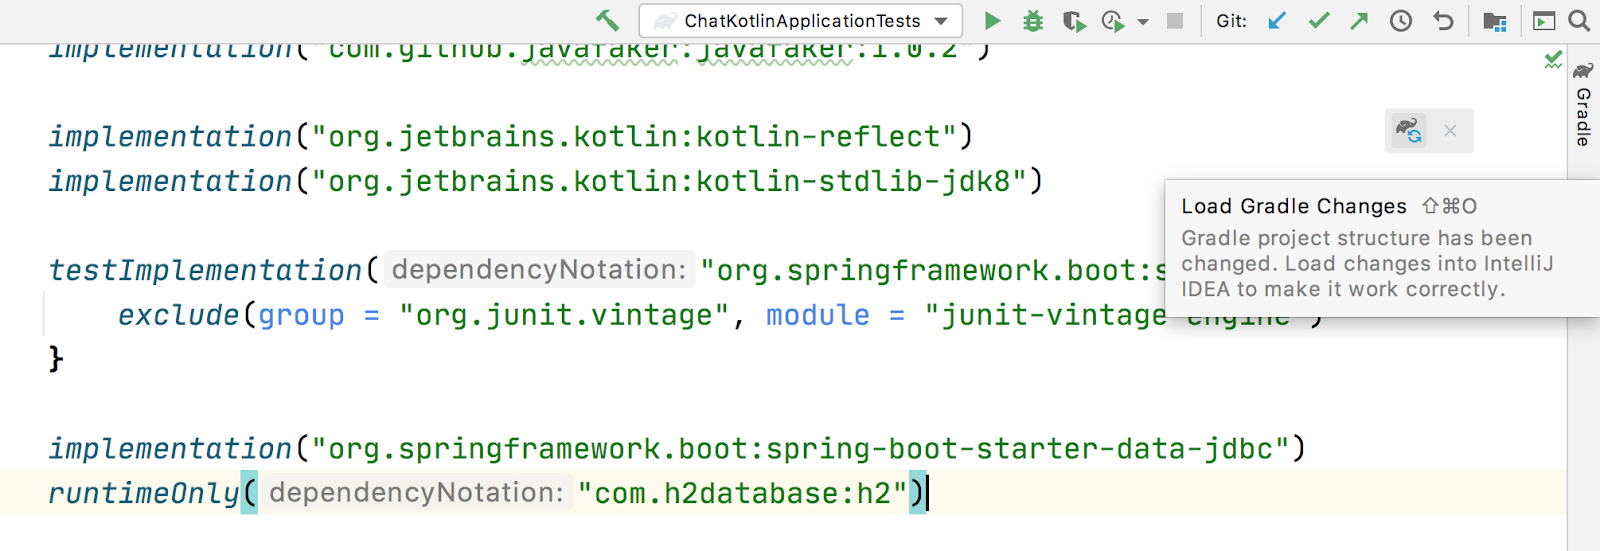
添加新的依赖项
首先,我们需要在项目中添加所需的依赖项。为此,我们需要在build.gradle.kts文件的dependencies块中添加以下几行代码:
implementation("org.springframework.boot:spring-boot-starter-data-jdbc")
runtimeOnly("com.h2database:h2")
⚠️ 注意,在这个例子中,我们使用 spring-data-jdbc 作为一种轻量级且直接的方式来在 Spring 框架中使用 JDBC。如果您想查看 JPA 的使用示例,请参阅以下 博客文章。
⚠️ 要刷新项目依赖列表,请点击编辑器右上角出现的小象图标。
创建数据库模式和配置
一旦依赖项被添加并解析完毕,我们就可以开始建模我们的数据库模式了。由于这是一个演示项目,我们不会设计任何复杂的东西,而是会遵循以下结构:
CREATE TABLE IF NOT EXISTS messages (
  id                     VARCHAR(60)  DEFAULT RANDOM_UUID() PRIMARY KEY,
  content                VARCHAR      NOT NULL,
  content_type           VARCHAR(128) NOT NULL,
  sent                   TIMESTAMP    NOT NULL,
  username               VARCHAR(60)  NOT NULL,
  user_avatar_image_link VARCHAR(256) NOT NULL
);
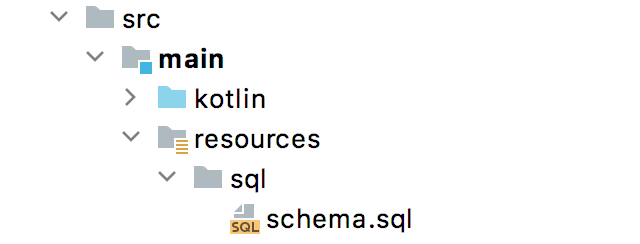
⌨️ 在 src/main/resources 目录下创建一个名为 sql 的新文件夹。然后将上面的 SQL 代码放入 src/main/resources/sql/schema.sql 文件中。
此外,您应该修改 application.properties,使其包含以下属性:
spring.datasource.schema=classpath:sql/schema.sql
spring.datasource.url=jdbc:h2:file:./build/data/testdb
spring.datasource.driverClassName=org.h2.Driver
spring.datasource.username=sa
spring.datasource.password=password
spring.datasource.initialization-mode=always
数据处理
使用 Spring Data,上述表可以通过以下领域类来表示,这些类应放在 src/main/kotlin/com/example/kotlin/chat/repository/DomainModel.kt 文件中:
import org.springframework.data.annotation.Id
import org.springframework.data.relational.core.mapping.Table
import java.time.Instant

@Table("MESSAGES")
data class Message(
    val content: String,
    val contentType: ContentType,
    val sent: Instant,
    val username: String,
    val userAvatarImageLink: String,
    @Id var id: String? = null)

enum class ContentType {
    PLAIN
}
这里有一些需要解释的地方。诸如 content、sent 和 id 这样的字段与 MessageVM 类中的字段相对应。然而,为了减少表的数量并简化最终的关系结构,我们将 User 对象扁平化,使其字段成为 Message 类的一部分。除此之外,还有一个名为 contentType 的新字段,它表示存储消息的内容类型。由于大多数现代聊天工具支持不同的标记语言,因此支持不同的消息内容编码是很常见的。最初我们只支持 PLAIN 文本,但稍后我们会扩展 ContentType 以支持 MARKDOWN 类型。
一旦我们将表表示为一个类,就可以通过 Repository 引入对数据的便捷访问。
⌨️ 将 MessageRepository.kt 放入 src/main/kotlin/com/example/kotlin/chat/repository 文件夹中。
import org.springframework.data.jdbc.repository.query.Query
import org.springframework.data.repository.CrudRepository
import org.springframework.data.repository.query.Param

interface MessageRepository : CrudRepository<Message, String> {

    // language=SQL
    @Query("""
        SELECT * FROM (
            SELECT * FROM MESSAGES
            ORDER BY "SENT" DESC
            LIMIT 10
        ) ORDER BY "SENT"
    """)
    fun findLatest(): List<Message>

    // language=SQL
    @Query("""
        SELECT * FROM (
            SELECT * FROM MESSAGES
            WHERE SENT > (SELECT SENT FROM MESSAGES WHERE ID = :id)
            ORDER BY "SENT" DESC
        ) ORDER BY "SENT"
    """)
    fun findLatest(@Param("id") id: String): List<Message>
}
我们的 MessageRepository 继承了一个普通的 CrudRepository,并提供了两个不同的方法,用于通过自定义查询检索最新消息和与特定消息 ID 关联的消息。
💡 您是否注意到了用于以可读格式表达 SQL 查询的多行字符串?Kotlin 为字符串提供了一系列有用的扩展。您可以在 Kotlin 语言的文档中了解更多关于这些扩展的内容。
我们的下一步是实现与 MessageRepository 类集成的 MessageService 类。
⌨️ 将 PersistentMessageService 类放入 src/main/kotlin/com/example/kotlin/chat/service 文件夹中,替换之前的 FakeMessageService 实现。
package com.example.kotlin.chat.service

import com.example.kotlin.chat.repository.ContentType
import com.example.kotlin.chat.repository.Message
import com.example.kotlin.chat.repository.MessageRepository
import org.springframework.context.annotation.Primary
import org.springframework.stereotype.Service
import java.net.URL

@Service
@Primary
class PersistentMessageService(val messageRepository: MessageRepository) : MessageService {

    override fun latest(): List<MessageVM> =
        messageRepository.findLatest()
            .map { with(it) { MessageVM(content, UserVM(username,
                              URL(userAvatarImageLink)), sent, id) } }

    override fun after(lastMessageId: String): List<MessageVM> =
        messageRepository.findLatest(lastMessageId)
            .map { with(it) { MessageVM(content, UserVM(username,
                              URL(userAvatarImageLink)), sent, id) } }

    override fun post(message: MessageVM) {
        messageRepository.save(
            with(message) { Message(content, ContentType.PLAIN, sent,
                         user.name, user.avatarImageLink.toString()) }
        )
    }
}
PersistentMessageService 是 MessageRepository 的一个薄层,因为在这里我们只是进行一些简单的对象映射。所有的业务查询都发生在 Repository 层面。另一方面,这种实现的简洁性归功于 Kotlin 语言,它提供了像 map 和 with 这样的扩展函数。
如果我们现在启动应用程序,我们将再次看到一个空白的聊天页面。然而,如果我们在文本输入框中输入一条消息并发送它,我们将看到它稍后出现在屏幕上。如果我们打开一个新的浏览器页面,我们将再次看到这条消息作为消息历史的一部分。
最后,我们可以编写一些集成测试,以确保我们的代码随着时间的推移仍然能够正常工作。
添加集成测试
首先,我们需要修改 /src/test 目录下的 ChatKotlinApplicationTests 文件,并添加我们将在测试中使用的字段:
import com.example.kotlin.chat.repository.ContentType
import com.example.kotlin.chat.repository.Message
import com.example.kotlin.chat.repository.MessageRepository
import com.example.kotlin.chat.service.MessageVM
import com.example.kotlin.chat.service.UserVM
import org.assertj.core.api.Assertions.assertThat
import org.junit.jupiter.api.AfterEach
import org.junit.jupiter.api.BeforeEach
import org.junit.jupiter.api.Test
import org.junit.jupiter.params.ParameterizedTest
import org.junit.jupiter.params.provider.ValueSource
import org.springframework.beans.factory.annotation.Autowired
import org.springframework.boot.test.context.SpringBootTest
import org.springframework.boot.test.web.client.TestRestTemplate
import org.springframework.boot.test.web.client.postForEntity
import org.springframework.core.ParameterizedTypeReference
import org.springframework.http.HttpMethod
import org.springframework.http.RequestEntity
import java.net.URI
import java.net.URL
import java.time.Instant
import java.time.temporal.ChronoUnit.MILLIS

@SpringBootTest(
        webEnvironment = SpringBootTest.WebEnvironment.RANDOM_PORT,
        properties = [
            "spring.datasource.url=jdbc:h2:mem:testdb"
        ]
)
class ChatKotlinApplicationTests {

    @Autowired
    lateinit var client: TestRestTemplate

    @Autowired
    lateinit var messageRepository: MessageRepository

    lateinit var lastMessageId: String

    val now: Instant = Instant.now()
}
我们使用 lateinit 关键字,它非常适合用于非空字段的初始化需要延迟的情况。在我们的例子中,我们用它来 @Autowire MessageRepository 字段并解析 TestRestTemplate。
为了简化,我们将测试三个通用场景:
-
当
lastMessageId不可用时解析消息。 -
当
lastMessageId存在时解析消息。 -
并发送消息。
为了测试消息解析,我们需要准备一些测试消息,并在每个测试用例完成后清理存储。将以下内容添加到 ChatKotlinApplicationTests 中:
@BeforeEach
fun setUp() {
    val secondBeforeNow = now.minusSeconds(1)
    val twoSecondBeforeNow = now.minusSeconds(2)
    val savedMessages = messageRepository.saveAll(listOf(
            Message(
                    "*testMessage*",
                    ContentType.PLAIN,
                    twoSecondBeforeNow,
                    "test",
                    "http://test.com"
            ),
            Message(
                    "**testMessage2**",
                    ContentType.PLAIN,
                    secondBeforeNow,
                    "test1",
                    "http://test.com"
            ),
            Message(
                    "`testMessage3`",
                    ContentType.PLAIN,
                    now,
                    "test2",
                    "http://test.com"
            )
    ))
    lastMessageId = savedMessages.first().id ?: ""
}

@AfterEach
fun tearDown() {
    messageRepository.deleteAll()
}
准备工作完成后,我们可以为消息检索创建第一个测试用例:
@ParameterizedTest
@ValueSource(booleans = [true, false])
fun `test that messages API returns latest messages`(withLastMessageId: Boolean) {
    val messages: List<MessageVM>? = client.exchange(
        RequestEntity<Any>(
            HttpMethod.GET,
            URI("/api/v1/messages?lastMessageId=${if (withLastMessageId) lastMessageId else ""}")
            ),
            object : ParameterizedTypeReference<List<MessageVM>>() {}).body

    if (!withLastMessageId) {
        assertThat(messages?.map { with(it) { copy(id = null, sent = sent.truncatedTo(MILLIS))}})
                .first()
                .isEqualTo(MessageVM(
                        "*testMessage*",
                        UserVM("test", URL("http://test.com")),
                        now.minusSeconds(2).truncatedTo(MILLIS)
                ))
    }

    assertThat(messages?.map { with(it) { copy(id = null, sent = sent.truncatedTo(MILLIS))}})
            .containsSubsequence(
                    MessageVM(
                            "**testMessage2**",
                            UserVM("test1", URL("http://test.com")),
                            now.minusSeconds(1).truncatedTo(MILLIS)
                    ),
                    MessageVM(
                            "`testMessage3`",
                            UserVM("test2", URL("http://test.com")),
                            now.truncatedTo(MILLIS)
                    )
            )
}
💡 所有的数据类都有一个 copy 方法,它允许您在必要时自定义某些字段的同时,完整复制该实例。这在我们当前的情况下非常有用,因为我们希望将消息发送时间截取到相同的时间单位,以便我们可以比较时间戳。
💡 Kotlin 对 字符串模板 的支持是测试中的一个极佳补充。
一旦我们实现了这个测试,最后一个需要实现的部分是消息发布测试。将以下代码添加到 ChatKotlinApplicationTests 中:
@Test
fun `test that messages posted to the API is stored`() {
    client.postForEntity<Any>(
            URI("/api/v1/messages"),
            MessageVM(
                    "`HelloWorld`",
                    UserVM("test", URL("http://test.com")),
                    now.plusSeconds(1)
            )
    )

    messageRepository.findAll()
            .first { it.content.contains("HelloWorld") }
            .apply {
                assertThat(this.copy(id = null, sent = sent.truncatedTo(MILLIS)))
                        .isEqualTo(Message(
                                "`HelloWorld`",
                                ContentType.PLAIN,
                                now.plusSeconds(1).truncatedTo(MILLIS),
                                "test",
                                "http://test.com"
                        ))
            }
}
💡 在测试中使用带有空格并用反引号括起来的函数名是可以接受的。请参阅相关文档。
上面的测试看起来与之前的类似,除了我们检查发布的消息是否存储在数据库中。在这个例子中,我们可以看到run作用域函数,它使得在调用作用域内将目标对象作为this使用成为可能。
一旦我们实现了所有这些测试,我们就可以运行它们并查看它们是否通过。

在这个阶段,我们为聊天应用程序添加了消息持久化功能。消息现在可以传递给所有连接到应用程序的活跃客户端。此外,我们现在可以访问历史数据,因此每个人都可以在需要时阅读之前的消息。
这个实现可能看起来已经完成,但我们编写的代码还有改进的空间。因此,我们将在下一步中看到如何使用 Kotlin 扩展来改进我们的代码。
第三部分:实现扩展
在这一部分,我们将实现扩展函数以减少某些地方的代码重复。
例如,您可能会注意到,Message 和 MessageVM 之间的转换目前显式地发生在 PersistableMessageService 中。我们可能还希望通过添加对 Markdown 的支持来扩展对不同内容类型的支持。
首先,我们为 Message 和 MessageVM 创建扩展方法。这些新方法实现了从 Message 到 MessageVM 以及反向的转换逻辑:
import com.example.kotlin.chat.repository.ContentType
import com.example.kotlin.chat.repository.Message
import com.example.kotlin.chat.service.MessageVM
import com.example.kotlin.chat.service.UserVM
import java.net.URL

fun MessageVM.asDomainObject(contentType: ContentType = ContentType.PLAIN): Message = Message(
        content,
        contentType,
        sent,
        user.name,
        user.avatarImageLink.toString(),
        id
)

fun Message.asViewModel(): MessageVM = MessageVM(
        content,
        UserVM(username, URL(userAvatarImageLink)),
        sent,
        id
)
⌨️ 我们将上述函数存储在 src/main/kotlin/com/example/kotlin/chat/Extensions.kt 文件中。
现在我们有了用于 MessageVM 和 Message 转换的扩展方法,我们可以在 PersistentMessageService 中使用它们:
@Service
class PersistentMessageService(val messageRepository: MessageRepository) : MessageService {

    override fun latest(): List<MessageVM> =
            messageRepository.findLatest()
                    .map { it.asViewModel() }

    override fun after(lastMessageId: String): List<MessageVM> =
            messageRepository.findLatest(lastMessageId)
                    .map { it.asViewModel() }

    override fun post(message: MessageVM) {
        messageRepository.save(message.asDomainObject())
    }
}
上面的代码比以前更好。它更简洁,阅读性也更强。然而,我们还可以进一步改进。如我们所见,我们使用了相同的 map() 操作符和相同的函数映射器两次。实际上,我们可以通过为特定泛型类型的 List 添加一个自定义的 map 函数来改进这一点。将以下代码行添加到 Extensions.kt 文件中:
fun List<Message>.mapToViewModel(): List<MessageVM> = map { it.asViewModel() }
包含这行代码后,Kotlin 将为任何泛型类型与指定类型对应的 List 提供上述扩展方法:
@Service
class PersistentMessageService(val messageRepository: MessageRepository) : MessageService {

    override fun latest(): List<MessageVM> =
        messageRepository.findLatest()
            .mapToViewModel() // now we can use the mentioned extension on List<Message>

    override fun after(lastMessageId: String): List<MessageVM> =
        messageRepository.findLatest(lastMessageId)
            .mapToViewModel()
    //...
}
⚠️ 请注意,不能为具有不同泛型类型的相同类使用相同的扩展名称。原因是类型擦除,这意味着在运行时,相同的方法将用于这两个类,因此无法猜测应该调用哪一个。
一旦所有扩展都应用完毕,我们可以采用类似的技巧,声明支持性扩展以在测试类中使用。将以下内容放入 src/test/kotlin/com/example/kotlin/chat/TestExtensions.kt 文件中。
import com.example.kotlin.chat.repository.Message
import com.example.kotlin.chat.service.MessageVM
import java.time.temporal.ChronoUnit.MILLIS

fun MessageVM.prepareForTesting() = copy(id = null, sent = sent.truncatedTo(MILLIS))

fun Message.prepareForTesting() = copy(id = null, sent = sent.truncatedTo(MILLIS))
现在我们可以继续前进,实现对 MARKDOWN 内容类型的支持。首先,我们需要添加用于 Markdown 内容渲染的工具。为此,我们可以将来自 JetBrains 的 官方 Markdown 库 添加到 build.gradle.kts 文件中:
dependencies {
   ...
   implementation("org.jetbrains:markdown:0.2.2")
   ...
}
既然我们已经学会了如何使用扩展,让我们在 Extensions.kt 文件中为 ContentType 枚举创建另一个扩展,这样每个枚举值都将知道如何渲染特定内容。
fun ContentType.render(content: String): String = when (this) {
    ContentType.PLAIN -> content
}
在上述示例中,我们使用了 when 表达式,它在 Kotlin 中提供了模式匹配功能。如果将 when 用作表达式,则 else 分支是必需的。然而,如果 when 表达式与穷举的值一起使用(例如具有固定数量结果的 enum 或具有定义子类数量的 sealed classes),则不需要 else 分支。上面的示例正是我们在编译时知道所有可能结果(并且所有结果都已处理)的情况之一,因此我们不需要指定 else 分支。
现在我们已经了解了 when 表达式的工作原理,接下来我们终于可以在 ContentType 枚举中添加第二个选项了:
enum class ContentType {
    PLAIN, MARKDOWN
}
when 表达式的强大之处在于它要求必须详尽无遗。每当向 enum 添加新值时,我们必须在将软件推送到生产环境之前修复编译问题:
fun ContentType.render(content: String): String = when (this) {
    ContentType.PLAIN -> content
    ContentType.MARKDOWN -> {
        val flavour = CommonMarkFlavourDescriptor()
        HtmlGenerator(content, MarkdownParser(flavour).buildMarkdownTreeFromString(content),
           flavour).generateHtml()
    }
}
一旦我们修复了 render 方法以支持新的 ContentType,我们就可以修改 Message 和 MessageVM 的扩展方法,以启用 MARKDOWN 类型并相应地渲染其内容:
fun MessageVM.asDomainObject(contentType: ContentType = ContentType.MARKDOWN): Message = Message(
        content,
        contentType,
        sent,
        user.name,
        user.avatarImageLink.toString(),
        id
)

fun Message.asViewModel(): MessageVM = MessageVM(
        contentType.render(content),
        UserVM(username, URL(userAvatarImageLink)),
        sent,
        id
)
我们还需要修改测试,以确保 MARKDOWN 内容类型能够正确渲染。为此,我们必须修改 ChatKotlinApplicationTests.kt 并更改以下内容:
@BeforeEach
fun setUp() {
    //...
            Message(
                    "*testMessage*",
                    ContentType.PLAIN,
                    twoSecondBeforeNow,
                    "test",
                    "http://test.com"
            ),
            Message(
                    "**testMessage2**",
                    ContentType.MARKDOWN,
                    secondBeforeNow,
                    "test1",
                    "http://test.com"
            ),
            Message(
                    "`testMessage3`",
                    ContentType.MARKDOWN,
                    now,
                    "test2",
                    "http://test.com"
            )
   //...
}

@ParameterizedTest
@ValueSource(booleans = [true, false])
fun `test that messages API returns latest messages`(withLastMessageId: Boolean) {
    //...

    assertThat(messages?.map { it.prepareForTesting() })
            .containsSubsequence(
                    MessageVM(
                            "<body><p><strong>testMessage2</strong></p></body>",
                            UserVM("test1", URL("http://test.com")),
                            now.minusSeconds(1).truncatedTo(MILLIS)
                    ),
                    MessageVM(
                            "<body><p><code>testMessage3</code></p></body>",
                            UserVM("test2", URL("http://test.com")),
                            now.truncatedTo(MILLIS)
                    )
            )
}

@Test
fun `test that messages posted to the API are stored`() {
    //...
    messageRepository.findAll()
            .first { it.content.contains("HelloWorld") }
            .apply {
                assertThat(this.prepareForTesting())
                        .isEqualTo(Message(
                                "`HelloWorld`",
                                ContentType.MARKDOWN,
                                now.plusSeconds(1).truncatedTo(MILLIS),
                                "test",
                                "http://test.com"
                        ))
            }
}
完成这一步后,我们会看到所有测试仍然通过,并且带有 MARKDOWN 内容类型的消息按预期渲染。
在这一步中,我们学习了如何使用扩展来提高代码质量。我们还学习了 when 表达式,以及它在添加新业务功能时如何减少人为错误。
第4部分:使用 Kotlin 协程重构为 Spring WebFlux
在本教程的这一部分中,我们将修改我们的代码库以添加对协程的支持。
本质上,协程是一种轻量级线程,使得可以用命令式的方式编写异步代码。这解决了与回调(观察者)模式相关的各种问题,而之前我们正是使用这种模式来实现相同的效果。
⚠️ 在本教程中,我们不会深入探讨协程和标准的 kotlinx.coroutines 库。要了解更多关于协程及其特性的信息,请查看以下教程。
添加协程
要开始使用 Kotlin 协程,我们需要在 build.gradle.kts 中添加三个额外的库:
dependencies {
    ...
    implementation("org.jetbrains.kotlinx:kotlinx-coroutines-core")
    implementation("org.jetbrains.kotlinx:kotlinx-coroutines-reactive")
    implementation("org.jetbrains.kotlinx:kotlinx-coroutines-reactor")
    ...
}
一旦我们添加了依赖项,就可以开始使用与协程相关的主要关键字:suspend。suspend 关键字表示被调用的函数是一个异步函数。与其他语言中通过 async 或 await 关键字暴露的类似概念不同,suspend 函数必须在协程上下文中处理,这可以是另一个 suspend 函数,也可以是使用 CoroutineScope.launch 或 runBlocking 函数显式创建的协程 Job。
因此,作为我们在项目中引入协程的第一步,我们将在所有项目的控制器和服务方法中添加 suspend 关键字。例如,修改后,MessageService 接口应如下所示:
interface MessageService {

    suspend fun latest(): List<MessageVM>

    suspend fun after(lastMessageId: String): List<MessageVM>

    suspend fun post(message: MessageVM)
}
上述更改也会影响我们代码中使用 MessageService 的地方。PersistentMessageService 中的所有函数都必须通过添加 suspend 关键字进行相应的更新。
@Service
class PersistentMessageService(val messageRepository: MessageRepository) : MessageService {

   override suspend fun latest(): List<MessageVM> =
       messageRepository.findLatest()
           .mapToViewModel()

   override suspend fun after(messageId: String): List<MessageVM> =
       messageRepository.findLatest(messageId)
           .mapToViewModel()

   override suspend fun post(message: MessageVM) {
       messageRepository.save(message.asDomainObject())
   }
}
两个请求处理器,HtmlController 和 MessageResource,也需要进行调整:
// src/main/kotlin/com/example/kotlin/chat/controller/HtmlController.kt

@Controller
class HtmlController(val messageService: MessageService) {

   @GetMapping("/")
   suspend fun index(model: Model): String {
       //...
   }
}
// src/main/kotlin/com/example/kotlin/chat/controller/MessageResource.kt

@RestController
@RequestMapping("/api/v1/messages")
class MessageResource(val messageService: MessageService) {

   @GetMapping
   suspend fun latest(@RequestParam(value = "lastMessageId", defaultValue = "") lastMessageId: String): ResponseEntity<List<MessageVM>> {
       //...
   }

   @PostMapping
   suspend fun post(@RequestBody message: MessageVM) {
       //...
   }
}
我们已经为迁移到响应式 Spring 堆栈(Spring WebFlux)做好了代码准备。请继续阅读!
添加 WebFlux 和 R2DBC
虽然在大多数情况下,添加 org.jetbrains.kotlinx:kotlinx-coroutines-core 依赖项就足够了,但为了与 Spring Framework 实现更好的集成,我们需要替换 web 和数据库模块:
dependencies {
    ...
    implementation("org.springframework.boot:spring-boot-starter-web")
    implementation("org.springframework.boot:spring-boot-starter-data-jdbc")
    ...
}
使用以下内容:
dependencies {
    ...
    implementation("org.springframework.boot:spring-boot-starter-webflux")
    implementation("org.springframework.boot:spring-boot-starter-data-r2dbc")
    implementation("io.r2dbc:r2dbc-h2")
    ...
}
通过添加上述依赖项,我们将标准的阻塞式Web MVC替换为完全响应式和非阻塞的WebFlux。此外,JDBC 也被替换为完全响应式和非阻塞的R2DBC。
多亏了所有 Spring Framework 工程师的辛勤工作,从 Spring Web MVC 迁移到 Spring WebFlux 是无缝的,我们完全不需要重写任何代码!然而,对于 R2DBC,我们还需要一些额外的步骤。首先,我们需要添加一个配置类。
⌨️ 我们将这个类放在 com/example/kotlin/chat/ChatKotlinApplication.kt 文件中,该文件包含我们应用程序的 main() 方法。
@Configuration
class Config {

    @Bean
    fun initializer(connectionFactory: ConnectionFactory): ConnectionFactoryInitializer {
        val initializer = ConnectionFactoryInitializer()
        initializer.setConnectionFactory(connectionFactory)
        val populator = CompositeDatabasePopulator()
        populator.addPopulators(ResourceDatabasePopulator(ClassPathResource("./sql/schema.sql")))
        initializer.setDatabasePopulator(populator)
        return initializer
    }
}
上述配置确保在应用程序启动时初始化表的架构。
接下来,我们需要修改 application.properties 中的属性,仅包含一个属性:
spring.r2dbc.url=r2dbc:h2:file:///./build/data/testdb;USER=sa;PASSWORD=password
在我们进行了一些基本的配置相关更改之后,我们将执行从 Spring Data JDBC 到 Spring Data R2DBC 的迁移。为此,我们需要将 MessageRepository 接口更新为继承自 CoroutineCrudRepository,并用 suspend 关键字标记其方法。我们按如下方式操作:
interface MessageRepository : CoroutineCrudRepository<Message, String> {

    // language=SQL
    @Query("""
        SELECT * FROM (
            SELECT * FROM MESSAGES
            ORDER BY "SENT" DESC
            LIMIT 10
        ) ORDER BY "SENT"
    """)
    suspend fun findLatest(): List<Message>

    // language=SQL
    @Query("""
        SELECT * FROM (
            SELECT * FROM MESSAGES
            WHERE SENT > (SELECT SENT FROM MESSAGES WHERE ID = :id)
            ORDER BY "SENT" DESC
        ) ORDER BY "SENT"
    """)
    suspend fun findLatest(@Param("id") id: String): List<Message>
}
CoroutineCrudRepository 的所有方法都是基于 Kotlin 协程设计的。
⚠️ 注意 @Query 注解现在位于不同的包中,因此应按以下方式导入:
import org.springframework.data.r2dbc.repository.Query
在这个阶段,这些更改应该足以使您的应用程序变为异步和非阻塞的。一旦应用程序重新运行,从功能角度来看,应该不会有任何变化,但现在的执行将是异步和非阻塞的。
最后,我们还需要对测试进行一些调整。由于我们的 MessageRepository 现在是异步的,我们需要更改数据源 URL,并在协程上下文中运行所有相关操作,这些操作将包含在 runBlocking 中,如下所示(在 ChatKotlinApplicationTests.kt 文件中):
// ...
// new imports
import kotlinx.coroutines.flow.first
import kotlinx.coroutines.runBlocking

@SpringBootTest(
        webEnvironment = SpringBootTest.WebEnvironment.RANDOM_PORT,
        properties = [
            "spring.r2dbc.url=r2dbc:h2:mem:///testdb;USER=sa;PASSWORD=password"
        ]
)
class ChatKotlinApplicationTests {
    //...

    @BeforeEach
    fun setUp() {
       runBlocking {
        //...
       }
    }

    @AfterEach
    fun tearDown() {
       runBlocking {
        //...
       }
    }

    //...

    @Test
    fun `test that messages posted to the API is stored`() {
       runBlocking {
        //...
       }
    }
}
我们的应用程序现在是异步和非阻塞的。但它仍然使用轮询来将消息从后端传递到 UI。在下一部分中,我们将修改应用程序,使用 RSocket 将消息流式传输到所有连接的客户端。
第5部分:使用 RSocket 进行流式传输
我们将使用 RSocket 将消息传递转换为类似流式处理的方式。
RSocket 是一种用于字节流传输(如 TCP 和 WebSockets)的二进制协议。该 API 为多种编程语言提供支持,包括 Kotlin。然而,在我们的示例中,我们不需要直接使用该 API。而是将使用 Spring Messaging,它与 RSocket 集成,并提供了一种基于注解的便捷配置方式。
要开始使用 Spring 中的 RSocket,我们需要在 build.gradle.kts 中添加并导入一个新的依赖项:
dependencies {
    ....
     implementation("org.springframework.boot:spring-boot-starter-rsocket")
    ....
}
接下来,我们将更新 MessageRepository,使其返回通过 Flow<Messages> 暴露的异步消息流,而不是 List。
interface MessageRepository : CoroutineCrudRepository<Message, String> {

    //...
    fun findLatest(): Flow<Message>

    //...
    fun findLatest(@Param("id") id: String): Flow<Message>
}
我们需要对MessageService接口进行类似的更改,以使其准备好支持流式处理。我们不再需要suspend关键字。相反,我们将使用Flow接口来表示异步数据流。任何产生List结果的函数现在将改为产生Flow。post方法也将接收Flow类型作为参数。
import kotlinx.coroutines.flow.Flow

interface MessageService {

   fun latest(): Flow<MessageVM>

   fun after(messageId: String): Flow<MessageVM>

   fun stream(): Flow<MessageVM>

   suspend fun post(messages: Flow<MessageVM>)
}
现在我们可以将这些点连接起来,并更新 PersistentMessageService 类以集成上述更改。
import com.example.kotlin.chat.asDomainObject
import com.example.kotlin.chat.asRendered
import com.example.kotlin.chat.mapToViewModel
import com.example.kotlin.chat.repository.MessageRepository
import kotlinx.coroutines.flow.Flow
import kotlinx.coroutines.flow.MutableSharedFlow
import kotlinx.coroutines.flow.map
import kotlinx.coroutines.flow.onEach
import kotlinx.coroutines.flow.collect
import org.springframework.stereotype.Service

@Service
class PersistentMessageService(val messageRepository: MessageRepository) : MessageService {

   val sender: MutableSharedFlow<MessageVM> = MutableSharedFlow()

   override fun latest(): Flow<MessageVM> =
       messageRepository.findLatest()
           .mapToViewModel()

   override fun after(messageId: String): Flow<MessageVM> =
       messageRepository.findLatest(messageId)
           .mapToViewModel()

   override fun stream(): Flow<MessageVM> = sender

   override suspend fun post(messages: Flow<MessageVM>) =
       messages
           .onEach { sender.emit(it.asRendered()) }
           .map {  it.asDomainObject() }
           .let { messageRepository.saveAll(it) }
           .collect()
}
首先,由于 MessageService 接口已更改,我们需要更新相应实现中的方法签名。因此,我们之前在 Extension.kt 文件中为 List 类型定义的 mapToViewModel 扩展方法现在需要用于 Flow 类型。
import kotlinx.coroutines.flow.Flow
import kotlinx.coroutines.flow.map

fun Flow<Message>.mapToViewModel(): Flow<MessageVM> = map { it.asViewModel() }
为了提高可读性,我们还为 MessageVM 类添加了 asRendered 扩展函数。在 Extensions.kt 文件中:
fun MessageVM.asRendered(contentType: ContentType = ContentType.MARKDOWN): MessageVM =
   this.copy(content = contentType.render(this.content))
接下来,我们将使用 Coroutines API 中的 MutableSharedFlow 来向连接的客户端广播消息。
通过这些更改,我们离期望的 UI 更近了一步。接下来,我们将更新 MessageResource 和 HtmlController。
MessageResource 将获得一个全新的实现。首先,我们将使用这个类通过应用 @MessageMapping 注解(而非 @RequestMapping)来支持消息传递。新方法 send() 和 receive() 通过 @MessageMapping("stream") 映射到同一个端点,以实现双工通信。
@Controller
@MessageMapping("api.v1.messages")
class MessageResource(val messageService: MessageService) {

   @MessageMapping("stream")
   suspend fun receive(@Payload inboundMessages: Flow<MessageVM>) =
       messageService.post(inboundMessages)

   @MessageMapping("stream")
   fun send(): Flow<MessageVM> = messageService
       .stream()
       .onStart {
           emitAll(messageService.latest())
       }
}
为了将消息发送到UI,我们从messageService中打开stream,该服务由PersistentMessageService类实现,并调用onStart方法来开始流式传输事件。当新客户端连接到服务时,由于传递给onStart方法的代码块emitAll(messageService.latest()),它将首先接收到历史消息。然后,通道保持打开状态以流式传输新消息。
HtmlController类不再需要处理任何流式逻辑。它的目的现在是提供静态页面,因此实现变得非常简单:
@Controller
class HtmlController() {

   @GetMapping("/")
   fun index(): String {
       // implemented in src/main/resources/templates/chatrs.html
       return "chatrs"
   }
}
请注意,UI 模板现在为 chatrs.html,而不是 chat.html。新模板包含了用于配置 WebSocket 连接的 JavaScript 代码,并直接与 MessageResource 类实现的 api.v1.messages.stream 端点进行交互。
为了让 RSocket 正常工作,我们需要对 application.properties 文件做最后一次修改。在配置中添加以下属性:
spring.rsocket.server.transport=websocket
spring.rsocket.server.mapping-path=/rsocket
应用程序已准备就绪!由于使用了 RSocket,消息现在无需轮询即可传递到聊天界面。此外,得益于 Spring WebFlux 和 Kotlin Coroutines,应用程序的后端是完全异步且非阻塞的。
在本教程中,我们的最后一步是更新测试。
我们将为测试添加一个额外的依赖项。Turbine 是一个小型测试库。它通过为 kotlinx.coroutines 的 Flow 接口提供一些有用的扩展,简化了测试过程。
dependencies {
    ...
    testImplementation("app.cash.turbine:turbine:0.4.1")
    ...
}
该库的入口是 Flow<T> 的 test() 扩展函数,它接受一个实现验证逻辑的代码块。test() 扩展函数是一个挂起函数,在流完成或取消之前不会返回。我们稍后将查看其应用。
接下来,更新测试依赖项。我们将使用构造函数来注入依赖项,而不是通过字段进行自动装配。
class ChatKotlinApplicationTests {

   @Autowired
   lateinit var client: TestRestTemplate

   @Autowired
   lateinit var messageRepository: MessageRepository

class ChatKotlinApplicationTests(
   @Autowired val rsocketBuilder: RSocketRequester.Builder,
   @Autowired val messageRepository: MessageRepository,
   @LocalServerPort val serverPort: Int
) {
我们使用 RSocketRequest.Builder 而不是 TestRestTemplate,因为 MessageResource 实现的端点通过 RSocket 协议进行通信。在测试中,我们需要构建一个 RSocketRequester 的实例,并使用它来发送请求。将旧的测试替换为以下新代码:
@ExperimentalTime
@ExperimentalCoroutinesApi
@Test
fun `test that messages API streams latest messages`() {
   runBlocking {
       val rSocketRequester =
            rsocketBuilder.websocket(URI("ws://localhost:${serverPort}/rsocket"))

       rSocketRequester
           .route("api.v1.messages.stream")
           .retrieveFlow<MessageVM>()
           .test {
               assertThat(expectItem().prepareForTesting())
                   .isEqualTo(
                       MessageVM(
                           "*testMessage*",
                           UserVM("test", URL("http://test.com")),
                           now.minusSeconds(2).truncatedTo(MILLIS)
                       )
                   )

               assertThat(expectItem().prepareForTesting())
                   .isEqualTo(
                       MessageVM(
                           "<body><p><strong>testMessage2</strong></p></body>",
                           UserVM("test1", URL("http://test.com")),
                           now.minusSeconds(1).truncatedTo(MILLIS)
                       )
                   )
               assertThat(expectItem().prepareForTesting())
                   .isEqualTo(
                       MessageVM(
                           "<body><p><code>testMessage3</code></p></body>",
                           UserVM("test2", URL("http://test.com")),
                           now.truncatedTo(MILLIS)
                       )
                   )

               expectNoEvents()

               launch {
                   rSocketRequester.route("api.v1.messages.stream")
                       .dataWithType(flow {
                           emit(
                               MessageVM(
                                   "`HelloWorld`",
                                   UserVM("test", URL("http://test.com")),
                                   now.plusSeconds(1)
                               )
                           )
                       })
                       .retrieveFlow<Void>()
                       .collect()
               }

               assertThat(expectItem().prepareForTesting())
                   .isEqualTo(
                       MessageVM(
                           "<body><p><code>HelloWorld</code></p></body>",
                           UserVM("test", URL("http://test.com")),
                           now.plusSeconds(1).truncatedTo(MILLIS)
                       )
                   )

               cancelAndIgnoreRemainingEvents()
           }
   }
}

@ExperimentalTime
@Test
fun `test that messages streamed to the API is stored`() {
   runBlocking {
       launch {
           val rSocketRequester =
                rsocketBuilder.websocket(URI("ws://localhost:${serverPort}/rsocket"))

           rSocketRequester.route("api.v1.messages.stream")
               .dataWithType(flow {
                   emit(
                       MessageVM(
                           "`HelloWorld`",
                           UserVM("test", URL("http://test.com")),
                           now.plusSeconds(1)
                       )
                   )
               })
               .retrieveFlow<Void>()
               .collect()
       }

       delay(2.seconds)

       messageRepository.findAll()
           .first { it.content.contains("HelloWorld") }
           .apply {
               assertThat(this.prepareForTesting())
                   .isEqualTo(
                       Message(
                           "`HelloWorld`",
                           ContentType.MARKDOWN,
                           now.plusSeconds(1).truncatedTo(MILLIS),
                           "test",
                           "http://test.com"
                       )
                   )
           }
   }
}
总结
这是教程的最后一部分。我们从一个简单的聊天应用程序开始,其中 UI 轮询新消息,而后端在执行数据库查询时阻塞。我们逐步为应用程序添加功能,并将其迁移到响应式 Spring 技术栈。现在后端完全异步,利用 Spring WebFlux 和 Kotlin 协程实现。